 My wife and I just closed on a wonderful 40 acre ranch in a very scenic area of Wyoming. We have been kind of jokingly referring to it as the L&M Ranch (for my wife
Leslie and myself, Mike). I decided to make that official by making a nice sign to go on the gate at the entrance to the property. This web page explains how I did it
and shows all the steps in the process.
My wife and I just closed on a wonderful 40 acre ranch in a very scenic area of Wyoming. We have been kind of jokingly referring to it as the L&M Ranch (for my wife
Leslie and myself, Mike). I decided to make that official by making a nice sign to go on the gate at the entrance to the property. This web page explains how I did it
and shows all the steps in the process.
Click on any photo for a larger view.
 I went to Lowes with the intention of buying some nice wood to make a sign for the gate of our new ranch. As I was looking around in the specialty wood section, I came across these pre-cut birch plywood
plaques. I looked at them and said, "Wow, I didn't know they sold these!" I grabbed a couple and headed for the register. The lady at the register looked at them
and exclaimed, "Wow, I didn't know we sold these! I need to get some." They were just about perfect for the job. They are just a tiny bit smaller than I was planning on, but the savings in work and nice
touches like pre-beveled edges is worth it.
I went to Lowes with the intention of buying some nice wood to make a sign for the gate of our new ranch. As I was looking around in the specialty wood section, I came across these pre-cut birch plywood
plaques. I looked at them and said, "Wow, I didn't know they sold these!" I grabbed a couple and headed for the register. The lady at the register looked at them
and exclaimed, "Wow, I didn't know we sold these! I need to get some." They were just about perfect for the job. They are just a tiny bit smaller than I was planning on, but the savings in work and nice
touches like pre-beveled edges is worth it.
There was a warning sticker on the back of these plaques that said something like, "Warning, cutting this material creates dust that is known to the state of California to cause cancer. Funny how most everything seems
to cause cancer in the state of California. Well, fortunately I live in Florida and am making a sign for Wyoming. So I just peeled that stupid sticker off and got to work.
| I was planning on engraving the sign on my home-made CNC router. It would be a perfect project for it. This is a video I made of the construction of the CNC router. Check it out if you are at all interested in how I built it. It works pretty well. I knew it would make short work of this sign. |
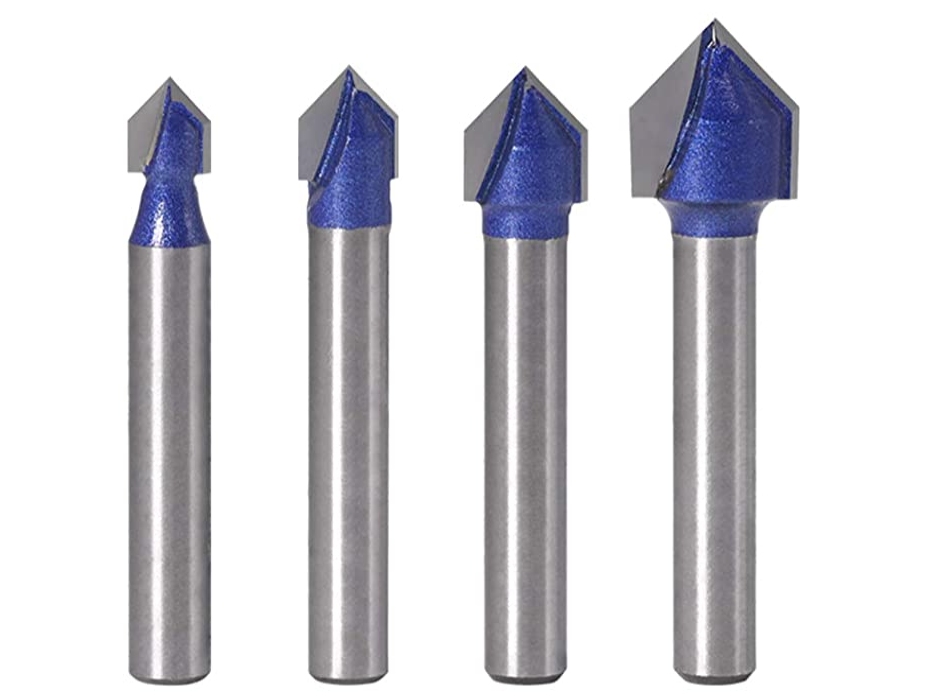 Not long ago I bought a set of 90 degree V router bits just like these for use with the CNC router. They will engrave lettering nicely. The width of the stroke is
determined by the depth of cut. The deeper the depth, the wider the stroke, up to the diameter of the bit. After buying them, I did some experimenting with them and did some test cuts to get the hang
of working with them.
Not long ago I bought a set of 90 degree V router bits just like these for use with the CNC router. They will engrave lettering nicely. The width of the stroke is
determined by the depth of cut. The deeper the depth, the wider the stroke, up to the diameter of the bit. After buying them, I did some experimenting with them and did some test cuts to get the hang
of working with them.
|
Click to learn how
to meet them
|
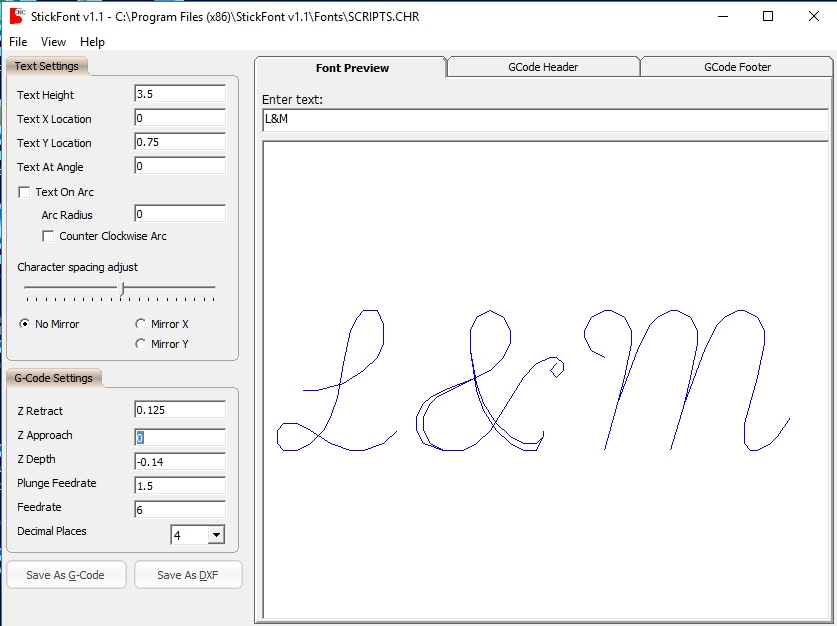 Next I had to create the g-code cut path for the router. I used a free program called StickFont. Stickfont is pretty limited in what it
can do, but since I am probably not going to be making a lot of signs, it is good enough. Plus the price is right. There is a free font pack that can also be downloaded to enhance the program with more
font options. I chose a script font from the font pack and started work.
Next I had to create the g-code cut path for the router. I used a free program called StickFont. Stickfont is pretty limited in what it
can do, but since I am probably not going to be making a lot of signs, it is good enough. Plus the price is right. There is a free font pack that can also be downloaded to enhance the program with more
font options. I chose a script font from the font pack and started work.
One limitation with Stickfont that I ran into right away is that it doesn't seem to allow multi-line text. At least I can't figure out how to make it do it. I got around that by making two different g-code
files, one for each line, and then merging them in Notepad. I guess I could have just executed the two files one after the other, but I wanted a single file I could make global changes to things like feed rate and depth of cut.
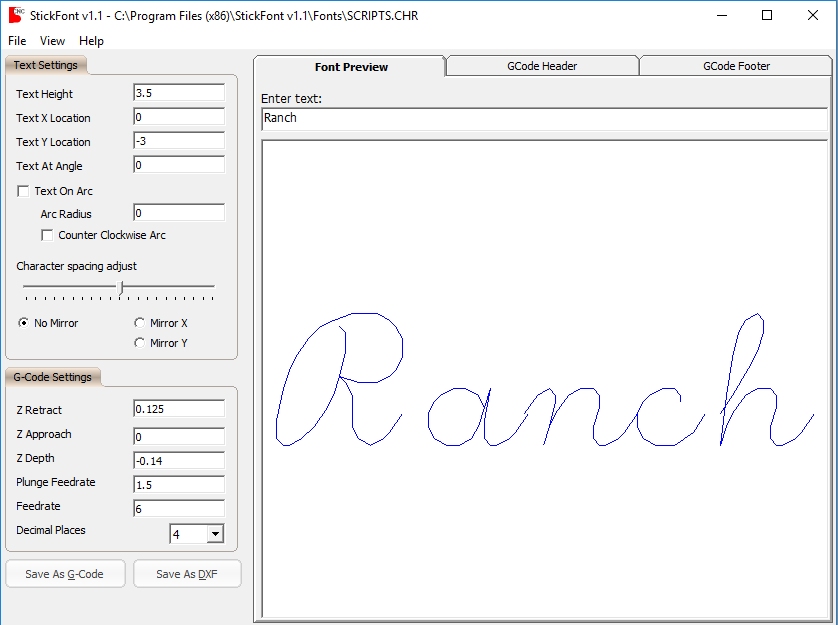 After laying out the L&M line above, I next did the Ranch line. It is all pretty straight-forward and easy to do in StickFont. Then I merged the two files into one.
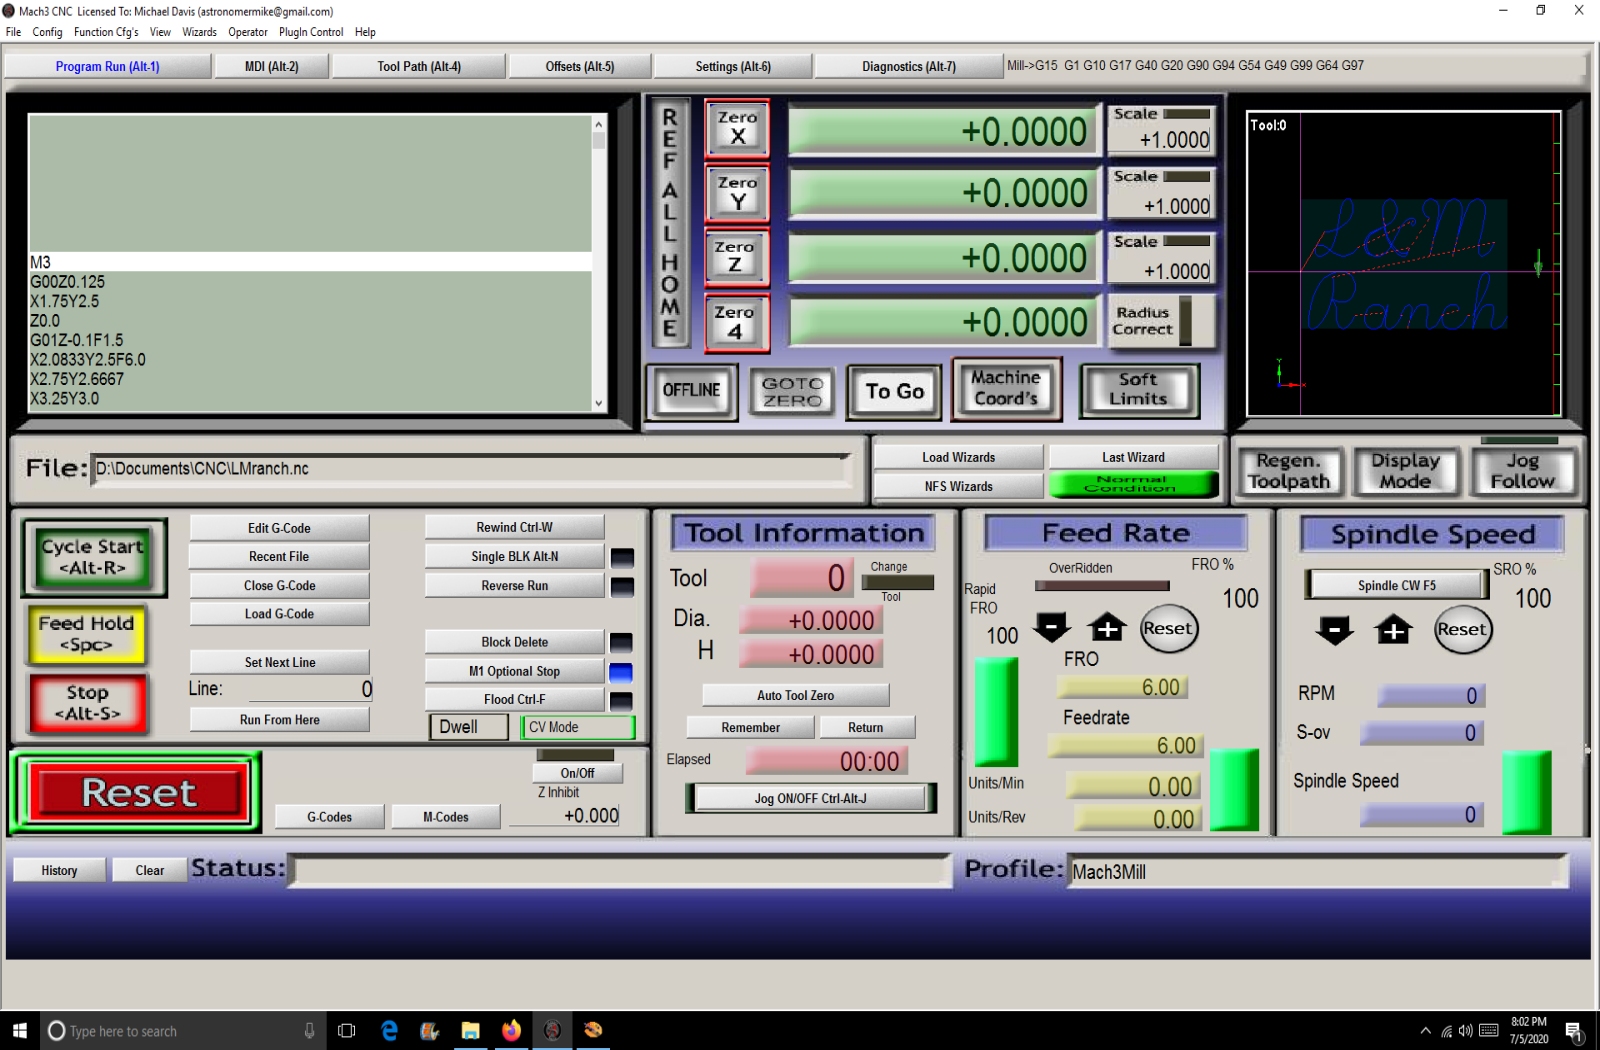 This picture shows the merged file imported into the Mach3 CNC controller cutting screen. at this point the program is ready go and cut.
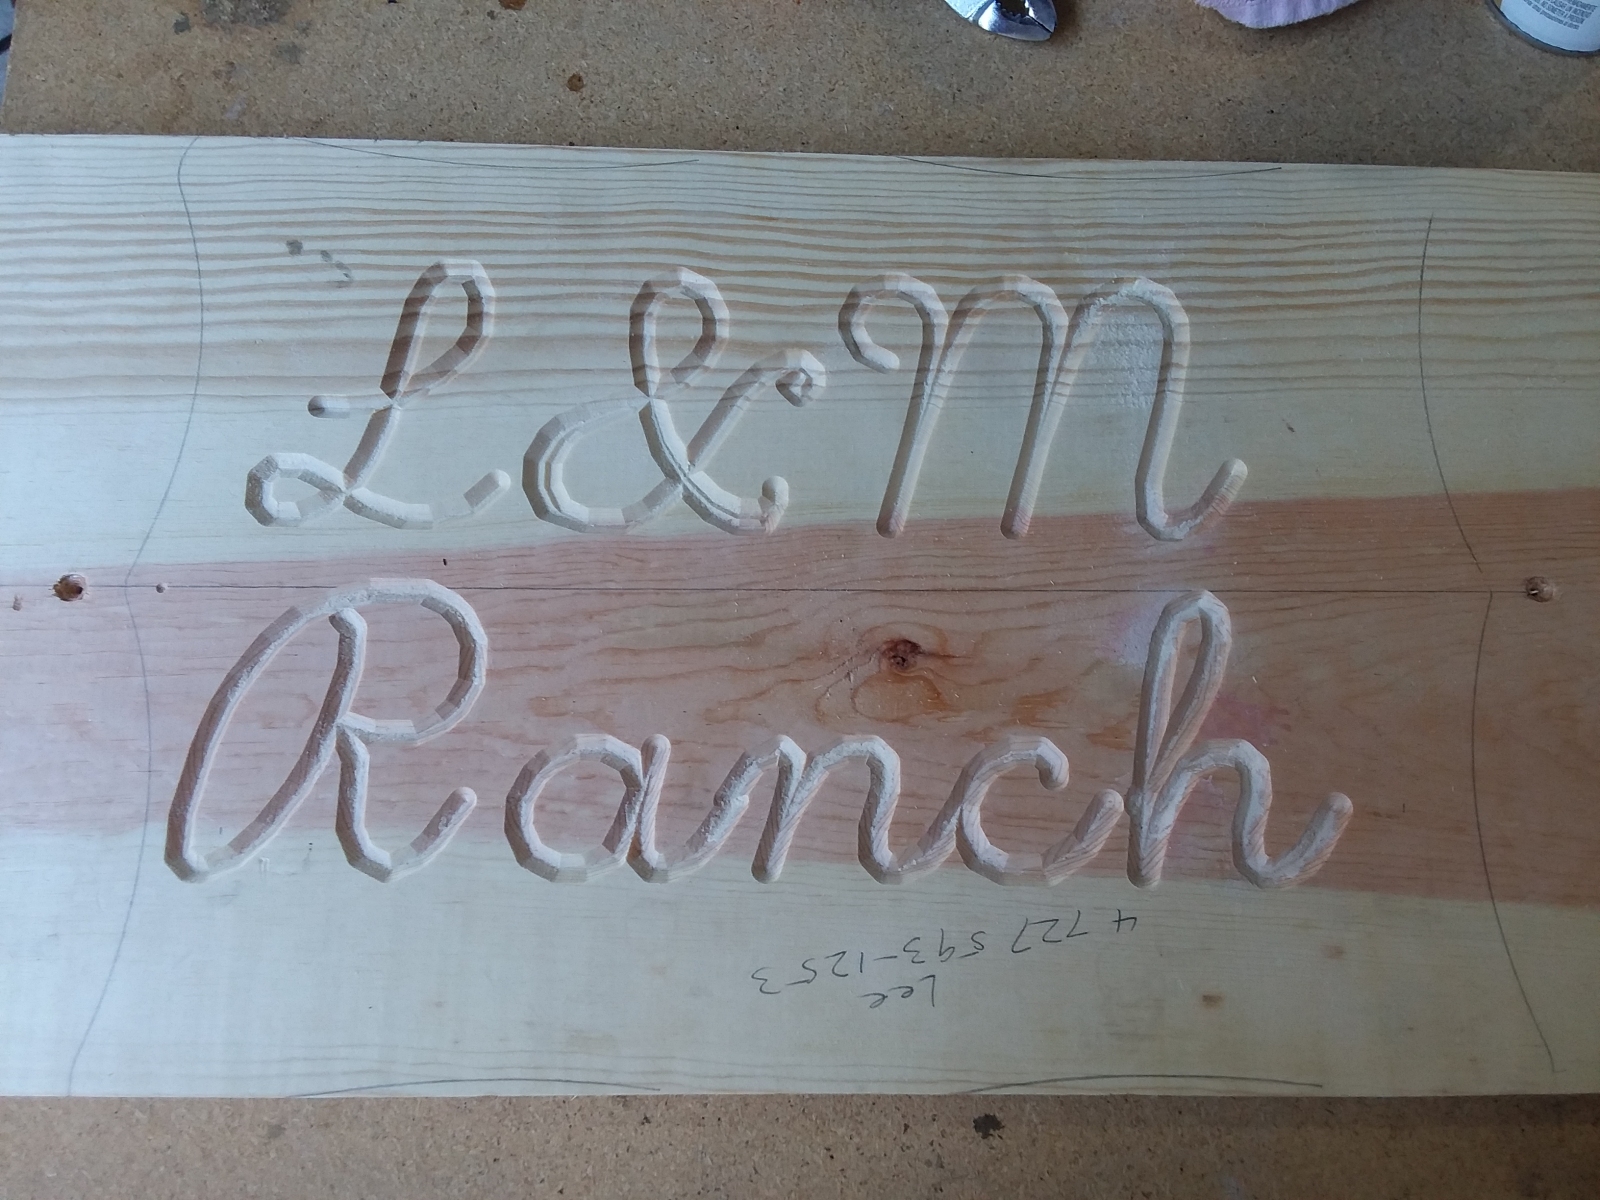 I first did a test cut in a piece of scrap wood, just to see how it was going to go. I had traced out the outline of one of the plaques on it, and made my best guess about the depth of cut and
where the origin point for the X and Y axes should be. as you can see, the test turned out pretty good. I decided the origin point needed to be adjusted to the right in X and down a bit in Y to center
up the lettering on the plaque. I also decided to make the depth of cut a bit deeper to make the strokes a bit wider.
I first did a test cut in a piece of scrap wood, just to see how it was going to go. I had traced out the outline of one of the plaques on it, and made my best guess about the depth of cut and
where the origin point for the X and Y axes should be. as you can see, the test turned out pretty good. I decided the origin point needed to be adjusted to the right in X and down a bit in Y to center
up the lettering on the plaque. I also decided to make the depth of cut a bit deeper to make the strokes a bit wider.
 Before cutting I drilled mounting holes in the corners of the plaque. They were used to mount the plaque on the spoil board of the CNC router. They will also be used to eventually mount the sign
on our gate.
Before cutting I drilled mounting holes in the corners of the plaque. They were used to mount the plaque on the spoil board of the CNC router. They will also be used to eventually mount the sign
on our gate.
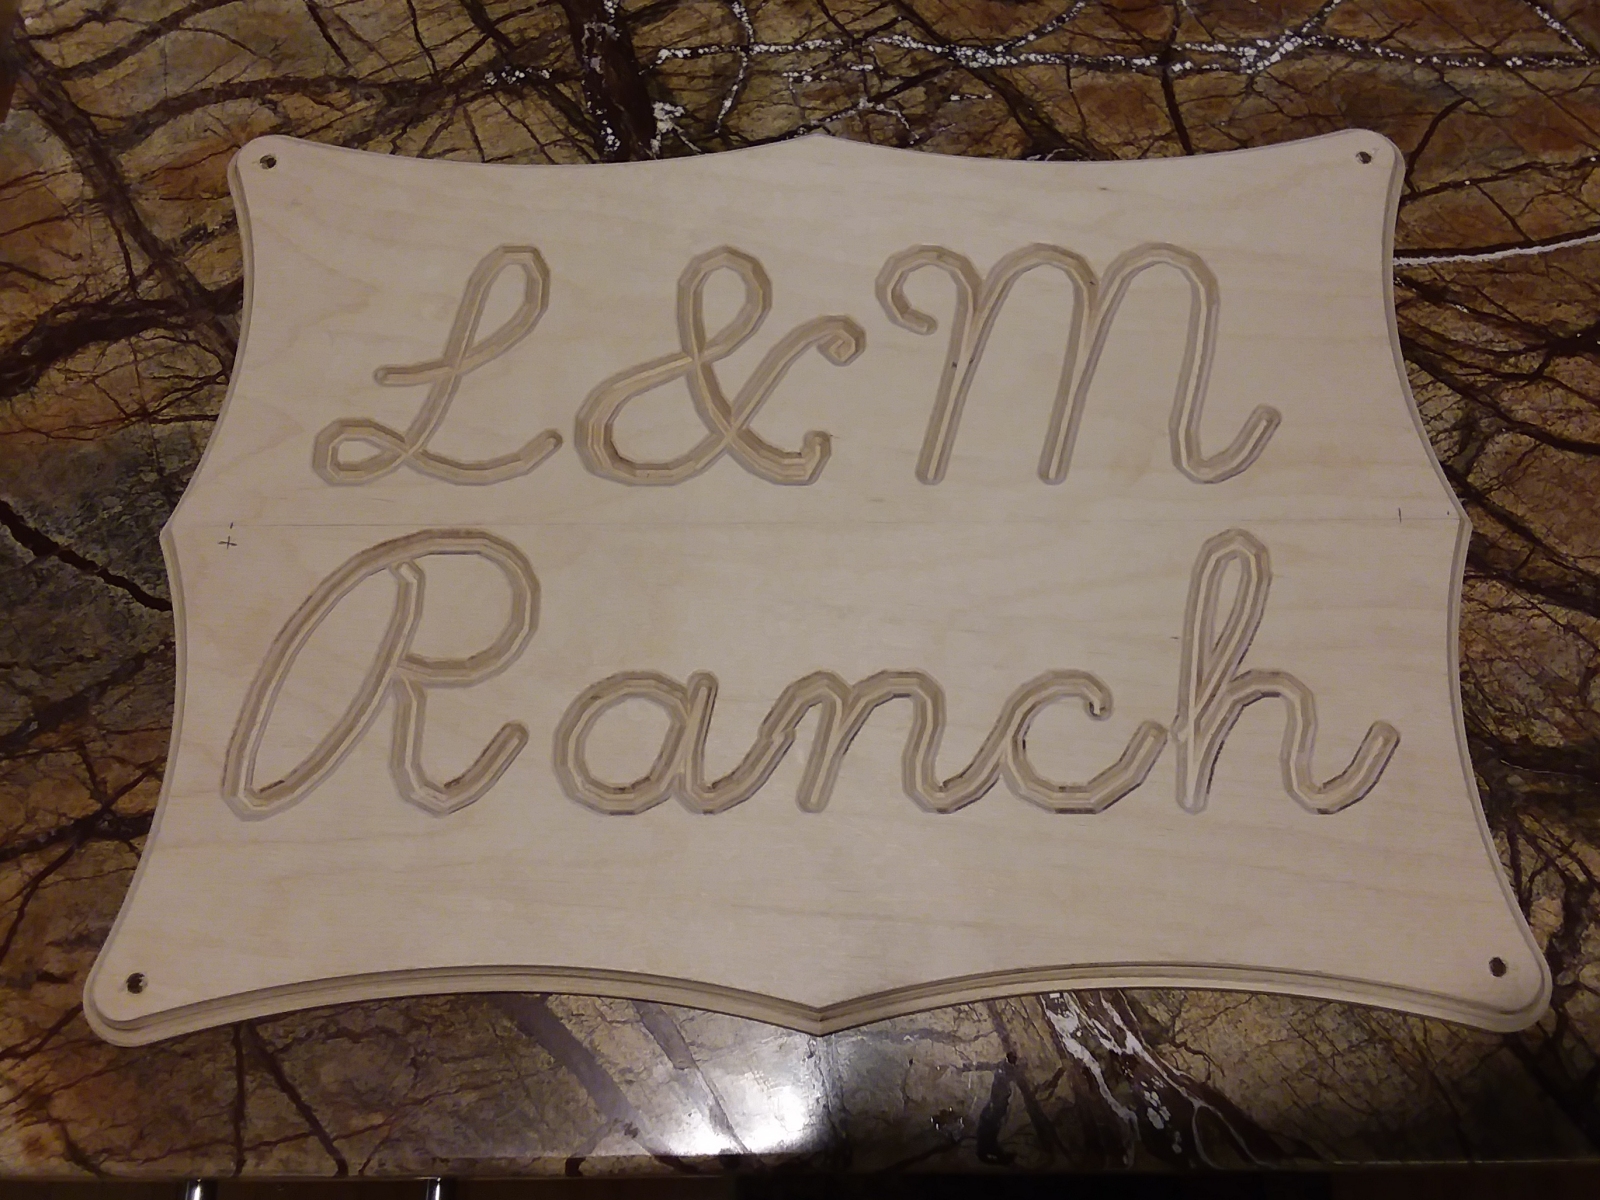
Here is the plaque after cutting. I cleverly forgot to get any photos or video of the actual cutting. Sorry. It went very well. No drama. In fact I walked away to do other things during the cut and
came back to find it done and perfect.
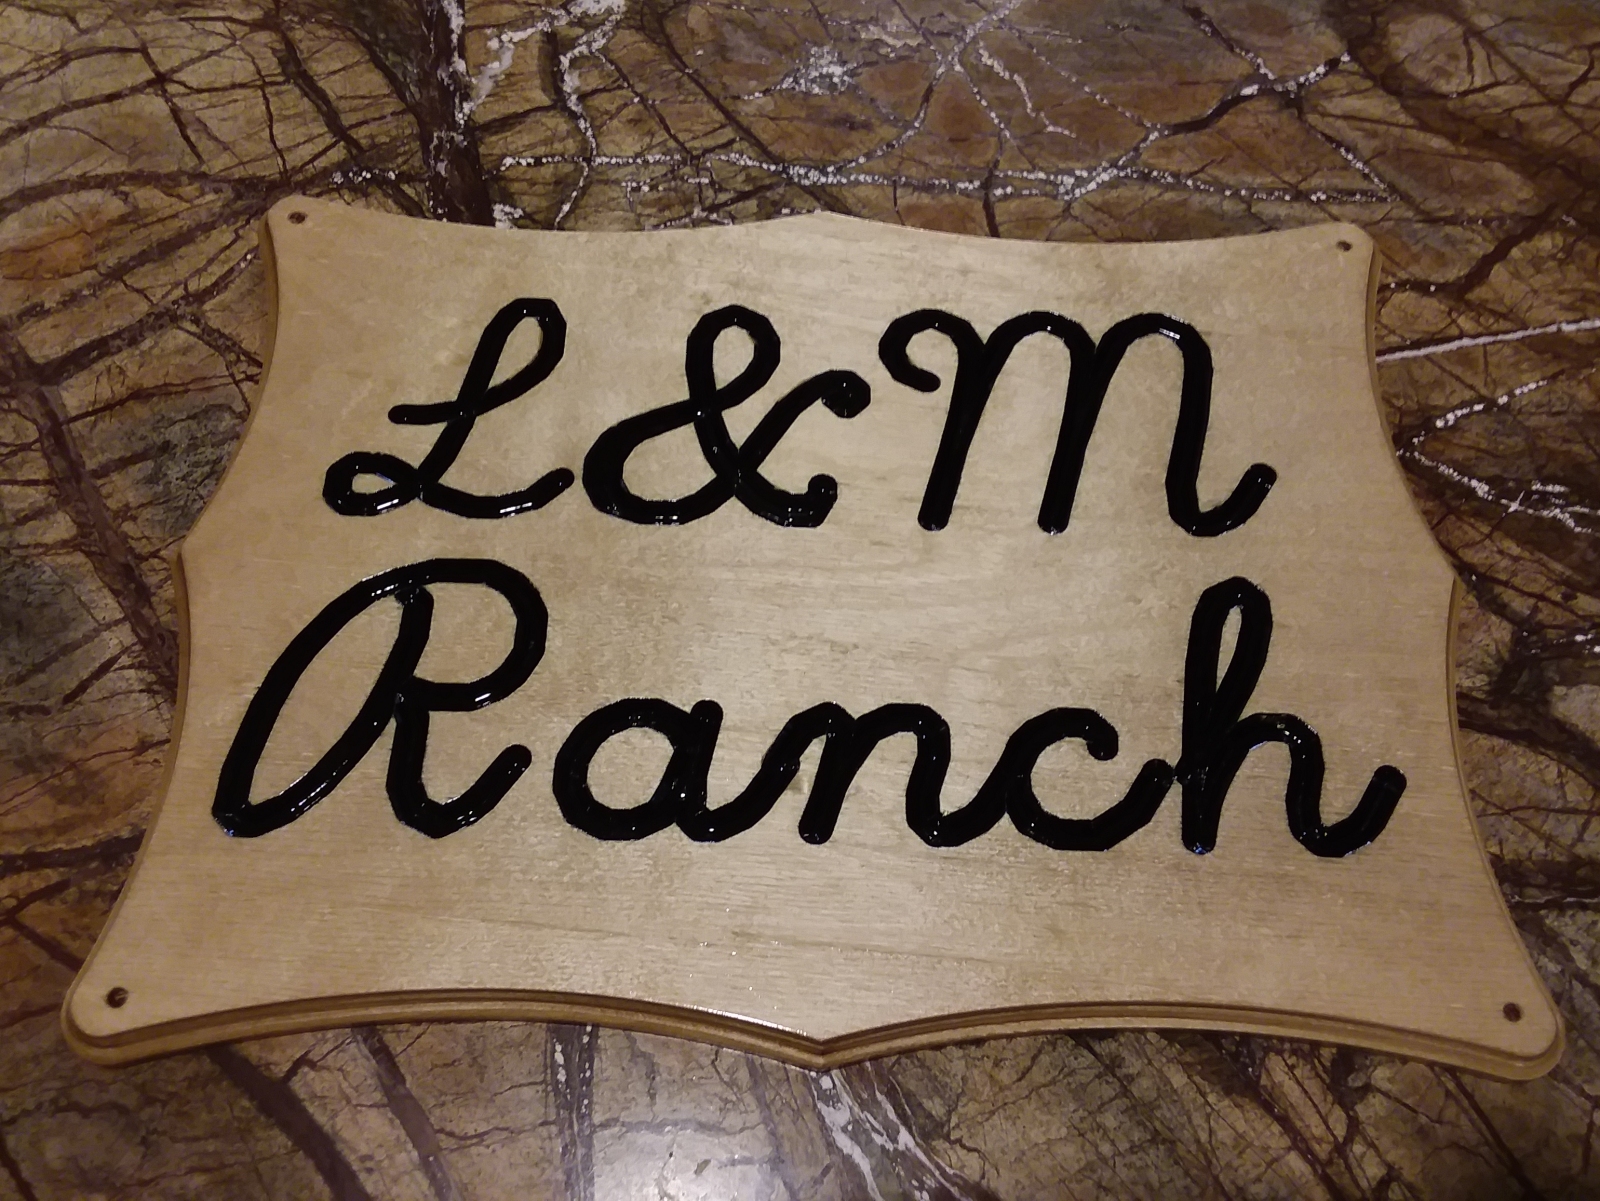
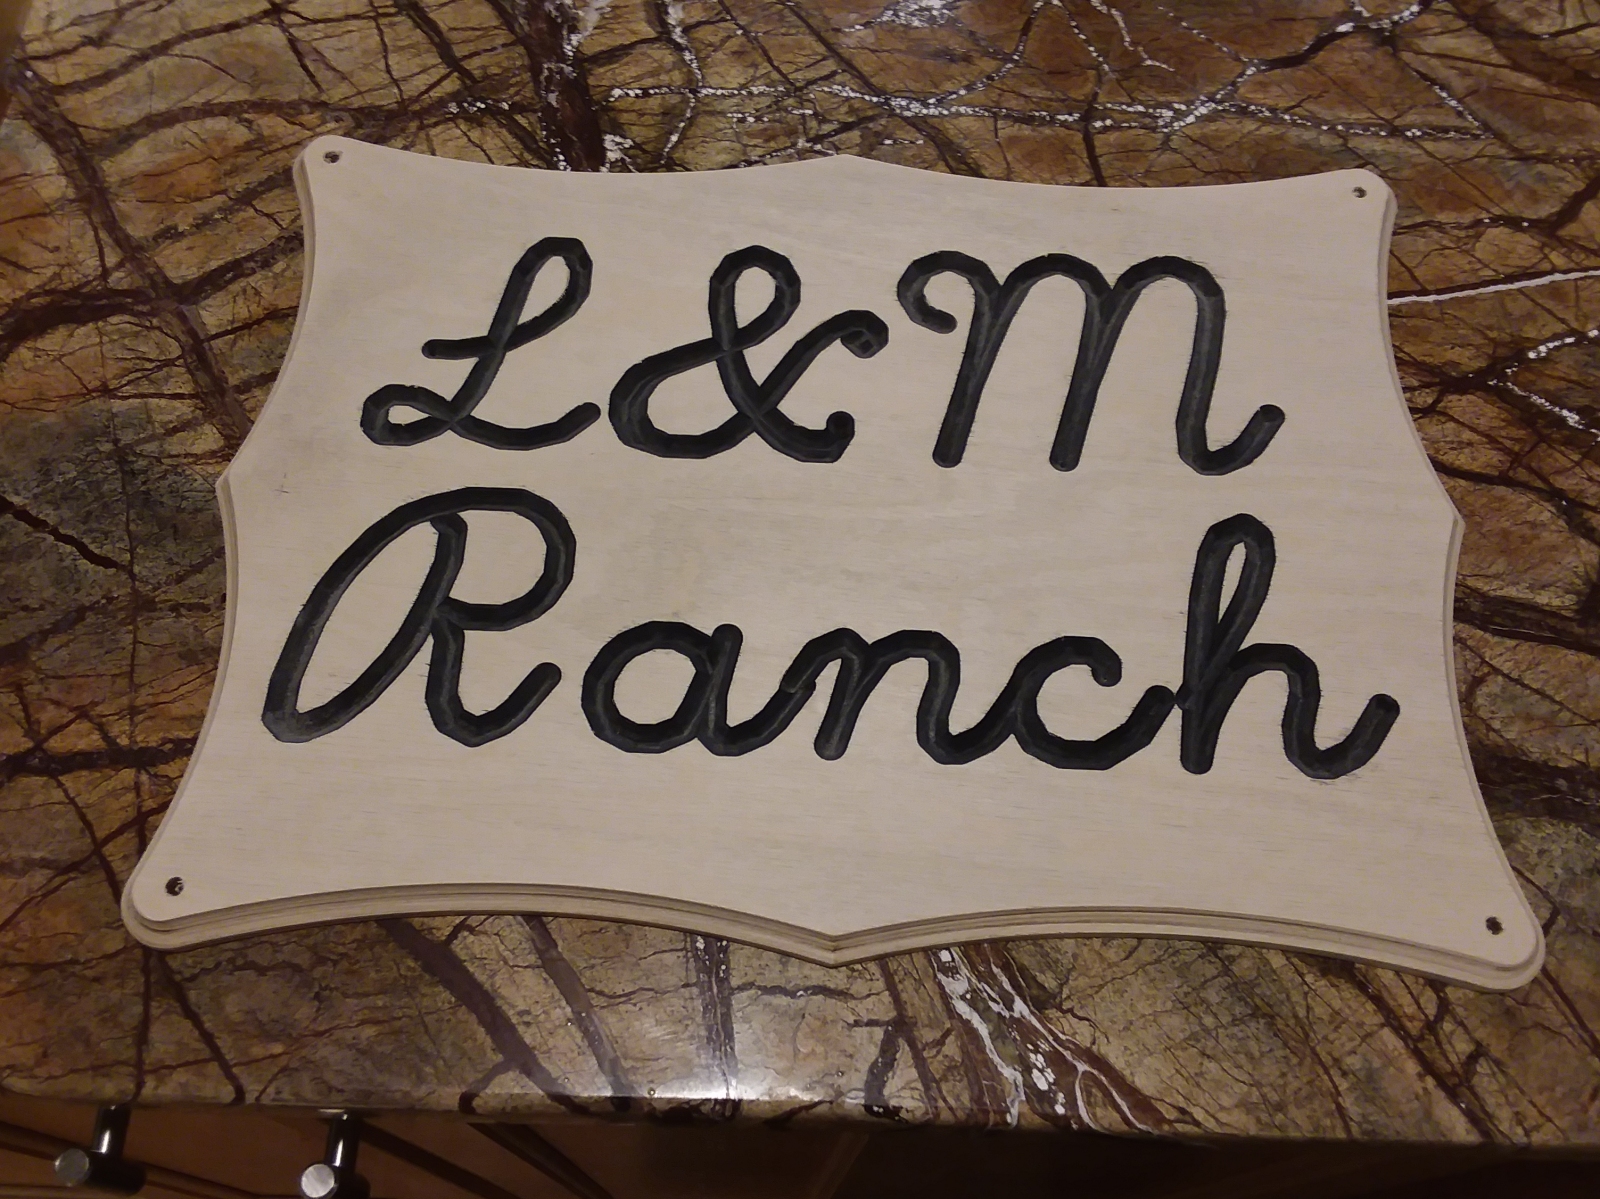 To add contrast to the sign, I filled in the lettering with black paint. Then I sanded the top. That removed areas where I slopped paint outside the lettering and made it look like I have the skills and
steady hand of a surgeon. The lettering really pops out now.
To add contrast to the sign, I filled in the lettering with black paint. Then I sanded the top. That removed areas where I slopped paint outside the lettering and made it look like I have the skills and
steady hand of a surgeon. The lettering really pops out now.
Here is the finished sign after giving it three coats of polyurethane with light sandings between coats. The sign looks really good, if I do say so myself. In fact it turned out so well that I almost
have to make some more signs for various things. I'll post more photos here when I do.
a lady to
learn how
to meet her